Bathroom waterproofing is a critical step in any home renovation project. It directly affects both the longevity of the property and your relationship with neighbors. Poor waterproofing can lead to minor issues like mold on walls or warped flooring, or severe consequences such as leaks that spark disputes and require tearing up tiles for rework. So how can you ensure a scientifically sound and standardized waterproofing process in your bathroom? This guide covers everything from material selection and substrate preparation to construction techniques and inspection standards.
1. Substrate Preparation: The Foundation of Waterproofing Success
1.1 Thorough Cleaning of the Base
Before starting, use a scraper to remove dust and cement debris from walls and floors. Pay special attention to pipe bases and corners, scrubbing grease and grime with a wire brush to ensure a solid, stable surface. According to the Baidu Encyclopedia entry on “waterproofing treatment,” any loose cement layer should be chiseled down to a firm substrate, and cracks should be filled with a leak-proof filler.
1.2 Reinforcing Critical Areas
Drainage points, pipe roots, and corners are high-risk areas for leaks. The “Bathroom Waterproofing Construction Standard” recommends applying 2–3 layers of waterproof coating at these points, followed by a non-woven fabric reinforcement layer at least 20cm wide. Around toilet waste pipes, form a “doughnut-shaped” raised structure 3–5cm high for extra protection.
1.3 Accurate Leveling and Moistening
Floors should be leveled with cement mortar, sloping towards drains, with the drain area 2–3cm lower than the surrounding floor. Prior to application, the substrate should be thoroughly moistened until surface-dry (no standing water) to prevent rapid water absorption that could compromise the waterproof coating’s curing.
2. Material Selection: Choosing the Right Products for Optimal Protection
2.1 Comparing Mainstream Waterproof Materials
-
Polymer Cement-Based Coatings (K11): Stretchability over 200%, ideal for lightly vibrating bathroom environments. Mix powder and liquid strictly according to the manufacturer’s instructions.
-
Polyurethane Waterproof Coatings: Offers uniform film thickness. Ensure ventilation during application and avoid contact with standing water before curing.
-
Waterproof Membranes: Suitable for larger bathrooms, but corners should be reinforced with coatings.
2.2 Calculating Material Usage
For a floor coating thickness of 1.5mm, about 1.8–2kg of material per square meter is required. For walls, the shower area should be coated up to 1.8 meters high, dry areas at least 30cm, and around bathtubs 20cm above the bathtub rim.
3. Standardized Construction Process
3.1 Layered Application Technique
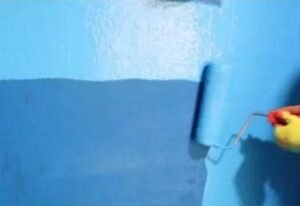
Apply the first coat using a cross-pattern thin layer. After surface drying (approximately 4–6 hours), apply the second coat vertically. The China Building Waterproofing Association recommends at least three coats, with finished thickness no less than 1.5mm for floors and 1.2mm for walls.
3.2 Handling Special Nodes
-
Under door thresholds, create a 2cm “water dam” with waterproof mortar before applying the overall coating.
-
Around wall-penetrating pipes, leave a 1cm groove, fill it with sealant, and then reinforce with waterproofing.
-
For channels cut for water and electricity, round them with waterproof mortar before overall coating.
3.3 Water Retention Test Standards
After full curing (typically 48 hours), fill the waterproofed area with at least 2cm of water and mark the level. The retention test should last no less than 72 hours, with daily inspection for water level changes and potential ceiling leakage below. In winter, extend the test to 96 hours as needed.
4. Common Waterproofing Mistakes
Mistake 1: “The Thicker, the Better”
Excessively thick layers can cause uneven curing and cracking. Apply thin layers multiple times, keeping each layer under 0.5mm.
Mistake 2: Using Tile Adhesive as Waterproofing
Some workers skip proper waterproofing and stick tiles directly. Always roughen the surface or use a primer to ensure adhesion.
Mistake 3: Tiling Immediately After Waterproofing
Coatings need time to fully cure. In summer, wait at least 24 hours; in winter, at least 48 hours before tiling.
5. Post-Construction Maintenance
5.1 Protecting Finished Surfaces
After inspection, lay a protective layer over the waterproof coating to prevent damage during further work. Avoid dragging materials and handle sharp objects carefully.
5.2 Periodic Inspection
Check drain flow every six months. Be alert to mold on walls, which may indicate hidden leaks, and call professionals for inspection if necessary.
5.3 Repair Considerations
For localized repairs, remove the original waterproof layer down to solid substrate. Make the repair cut in a stepped shape, with at least a 10cm overlap between old and new waterproof layers.
Conclusion:
Proper bathroom waterproofing is more than just a construction step—it’s a safeguard for your home’s longevity and comfort. By following standardized procedures, using the right materials, and performing regular maintenance, you can prevent leaks, protect your investment, and enjoy peace of mind for years to come.
Contact Us
For more information or to inquire about our waterproof floor paint solutions, feel free to get in touch with us. We’re here to help!
- Phone: +86 138 6365 6701
- Email: Huafengwaterproof@gmail.com
- WhatsApp: +86 138 6365 6701
We look forward to assisting you with all your waterproofing needs!


