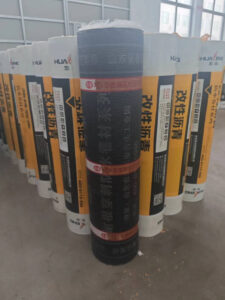
Waterproofing is critical for extending the lifespan of building structures, especially roofs. Contractors widely use SBS (Styrene-Butadiene-Styrene) and APP (Atactic Polypropylene) membranes for waterproofing projects. This guide details the installation process to ensure optimal water damage protection.
1. Installation Process Overview
-
Clean the substrate
-
Apply primer
-
Install reinforcement layers (if required)
-
Lay the membrane
-
Seal joints and edges
-
Add protective layer
2. Substrate Preparation
A clean, dry surface ensures proper membrane adhesion. Follow these steps:
2.1 Remove Contaminants
-
Sweep away dust, dirt, and debris.
-
Scrape off residual mortar, protrusions, or hardened adhesive.
2.2 Verify Surface Dryness
-
The substrate moisture content must not exceed 9%.
-
Test dryness by placing a 1m² membrane section on the surface for 3–4 hours. If no watermarks appear, proceed with installation.
3. Primer Application
-
Use a brush to coat joints, corners, and edges evenly.
-
Adjust drying time based on primer specifications and project schedule.
-
Apply a thin, uniform layer without bubbles, gaps, or uneven spots.
-
The primer should feel dry but not sticky before membrane installation.
4. Membrane Installation
4.1 Positioning & Alignment
-
Mark reference lines on the substrate for accurate placement.
-
Follow slope-based installation guidelines:
-
≤3% slope: Lay membrane parallel to the ridge.
-
3–15% slope: Install parallel or perpendicular to the ridge.
-
≥15% slope: Place perpendicular to the ridge.
-
-
Overlap adjacent sheets by at least 1/3 of the membrane width.
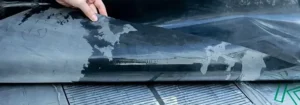
4.2 Heat-Activated Installation
-
Cut the membrane to size and roll it for easier handling.
-
Align the edge with the starting point and unroll smoothly.
-
Heat the membrane and substrate simultaneously using a gas torch (30–45° angle, ~300mm distance).
-
Move the torch until the bitumen melts (shiny, bubbly surface), then press the membrane firmly with a roller.
4.3 Overlap Requirements
-
Single-layer systems: 100mm side overlap, 150mm end overlap.
-
Double-layer systems: 80mm side overlap, 100mm end overlap.
-
Allow ±10mm tolerance—avoid wrinkles or overstretching.
4.4 Sealing & Finishing
-
Seal all overlaps with a 10mm-wide bead of sealant.
-
Ensure seams are straight, smooth, and heat-welded securely.
-
Extend the membrane ≥250mm up walls and around penetrations.
-
Reinforce corners, drains, and edges per design specifications.
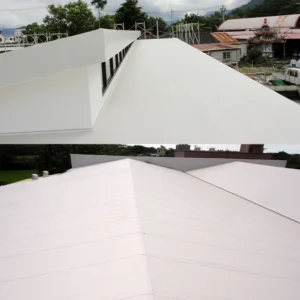
5. Protection Layer
After inspection, apply a cement mortar or fine stone concrete layer to shield the membrane from physical damage and weathering.
Conclusion
Proper installation of SBS/APP membranes ensures long-lasting waterproofing performance. By following these steps, contractors can prevent water infiltration and enhance roof durability.
Contact Us
For more information or to inquire about our waterproof floor paint solutions, feel free to get in touch with us. We’re here to help!
- Phone: +86 138 6365 6701
- Email: Huafengwaterproof@gmail.com
- WhatsApp: +86 138 6365 6701
We look forward to assisting you with all your waterproofing needs!