Waterproof roofing tape might feel like a miracle answer when you have to manage those annoying roof problems. You could be tempted to grab this sticky fix-all. It can seal up some leaks and stop water damage without being too expensive or requiring too much work!
The truth is that roofing tape can work as a temporary fix for small problems like small leaks or damaged flashing. But you need to know what it can and can’t do. Your success with the tape comes down to how well you prep the surface and stick it on right. The weather plays a big part, too. Even if you do everything right, you shouldn’t count on it long-term.
I’ll dig into the useful facts and drawbacks about waterproof roofing tape. Let’s jump right in and break it down!
The Capabilities
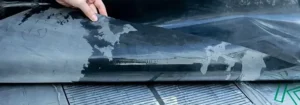
Waterproof roofing tape can be a useful answer for sealing joints and stopping water damage on your roof. You’ll find that it’s made with advanced materials – think fiberglass coated with waterproof resin or butyl rubber. These materials work together to create tough and long-term seals. These materials don’t just keep water out. They also fight off chemicals and manage extreme temperatures while staying flexible enough to move with your roof.
You can count on most waterproof roofing tapes to work well in temperatures from way below freezing up to 200 degrees Fahrenheit. Once you apply it the right way to clean and dry surfaces around vents, skylights and roof edges you’ll get immediate protection. It’s reliable for those times when you need a quick fix on flat or sloped roofs.
RV enthusiasts love waterproof roofing tape because it keeps their vehicles leak-free on the road. Since the tape moves and flexes along with your RV while maintaining its grip, you can see why it works for life on the wheels. The strong adhesive won’t give up even when your RV faces non-stop road vibrations and whatever weather comes your way.
Modern roofing tape has stepped up its game! Now, you can find versions that actually heal themselves around nail holes. Thanks to advanced acrylic adhesives, you can adjust the tape’s position at first while still maintaining adhesion for the long haul. Some options even come with metallic layers that protect against harsh UV rays.
Professional builders reach for waterproof roofing tape when they need to seal gutters and downspouts against sneaky water leaks. You’ll love how it hugs irregular shapes and bridges gaps very easily. Since it sticks well to materials like metal, cement, plywood, and plastic, you can use it almost anywhere outdoors.
The best results come from paying attention to small details during installation. Make sure you’re working with a clean surface for the strongest bond. Press down evenly to keep air bubbles and wrinkles away. Remember to overlap each piece by at least half its width. This technique guarantees complete coverage and lasting protection.
Ease of Application
When you work with waterproof roofing tape, it isn’t as tricky as you might think! You just need to get a few basic tools to get going. You need to grab your measurement tape, utility knife and hand roller. Remember to protect yourself too. You should put on some gloves and safety items before you start working.
Your roof needs to be spotless and completely dry before you can start. You can sweep off any dirt or debris and give it a quick wipe with some soapy water if it looks extra grimy! Take a complete look around for any damaged areas that need fixing. You’ll want to patch up those cracks and holes first.
When you start from the bottom of your roof, it makes the most sense because that’s how water naturally flows down. As you work your way up, the tape will follow different surfaces like your roof deck panels and fascia boards.
The weather affects how well your tape will follow surfaces. You’ll want to wait for a day when it’s at least 40 degrees Fahrenheit outside. If you try to work in cold and wet conditions, you might run into problems later. The tape won’t stick the right way.
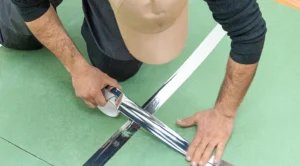
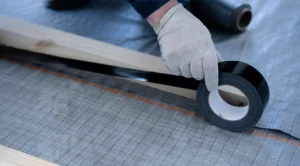
Here’s how to put the tape down – you can slowly peel off the backing while pressing as you go along. You’ll need to overlap each piece by at least 4 inches at the ends. Then take your hand roller and press everything down well to make sure it’s stuck tight.
For those vertical seams, you should work from top to bottom. Put the tape right in the middle of the seam. Make sure it goes about an inch higher than where the seam starts. You’ll need to focus closely on these places because they’re usually where leaks pop up.
Your roofing tape should now follow most surfaces on its own! But sometimes hard materials like brick need a primer first. If you see the surface feels powdery and flaky, primer will help the tape stick better.
Keep an eye out for any bubbles or wrinkles as you’re working – these sections could let water sneak in later. The corners and edges need extra attention too since these are the first places where tape starts coming loose.
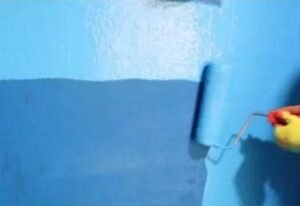
For more information or to inquire about our roof waterproofing solutions and waterproof floor paint products, feel free to get in touch with us. We’re here to help!
- Phone: +86 138 6365 6701
- Email: Huafengwaterproof@gmail.com
- WhatsApp: +86 138 6365 6701
We look forward to assisting you with all your waterproofing needs!