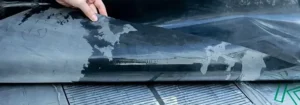
Among the many waterproofing options available, non-bituminous self-adhesive waterproof membranes—especially polymer-based types—are gaining popularity due to their ease of application, eco-friendliness, and outstanding performance. In this article, we’ll outline the standard installation procedures for these membranes and offer guidance on how to select the best leak repair materials.
✅ Preparation Before Installation
Proper substrate preparation is essential for effective waterproofing. Before applying polymer self-adhesive membranes:
-
Surface Cleaning: All surfaces must be clean, dry, flat, and firm. Remove all loose particles, dust, and flaking materials.
-
Leveling Layer: Apply a 20mm-thick cement-sand leveling layer (mix ratio 1:2.5) to even out concrete floors and retaining walls.
-
Flatness Requirement:
Surface flatness must meet this standard:
d/L ≤ 1/20
(D = max depth between adjacent high points; L = distance between these points)
Smooth out all irregular areas. -
Sharp Objects: Remove protruding steel bars or sharp concrete edges. Patch with 1:2.5 cement mortar.
-
Corners: All internal and external corners must be rounded:
-
Internal corners: 5cm x 5cm radius
-
External corners: 20mm x 20mm radius
Use the same 1:2.5 mortar for chamfering.
-
🔧 Step-by-Step Installation Process
1. Reinforcement Layer
Install a 50cm-wide reinforcing strip of the same membrane at the junction of the slab and sidewalls.
2. Membrane Application Sequence
Apply the membrane in this order:
Platform → Bottom Beam → Floor Slab → Side Walls
Work northward from the south edge.
Sidewalls should be covered from bottom to top.
For double-sided membranes:
-
PE side (non-adhesive) faces the structure.
-
Adhesive side faces outward.
3. Mechanical Fastening (for vertical walls)
-
Secure the membrane using fasteners.
-
Fastener spacing: ≤30cm
-
Distance from membrane edge: 1–2cm
-
Fastener length: ≥30mm
-
Use washers (≥20mm diameter, ≥1mm thick).
4. Overlap & Sealing
-
Longitudinal overlap: 100mm (on adhesive edge)
-
Avoid T-joints and cross joints.
-
Use sealing tape (at least 160mm wide) to cover overlaps and nail holes.
-
For wall membranes: extend 50cm above the rebar ends.
5. Temporary Fixing
Use mechanical fasteners to temporarily secure the membrane ends to prevent slippage.
6. Quality Inspection
Each section must be inspected and approved before continuing. Repair any defects immediately.
🧱 Waterproof Construction Joints
1. Joint Types
-
Horizontal (longitudinal)
-
Vertical (circumferential): spacing ≤18m
2. Joint Placement
-
Avoid horizontal joints in high-shear zones or slab-wall intersections.
-
Joints should be ≥300mm away from slab surface.
-
For slab-wall combos: place joints 150–300mm below the joining line.
3. Before Concrete Pouring
-
Horizontal joints:
-
Clean surface.
-
Apply cement-based crystalline waterproof coating (1.5kg/m²).
-
Add 30–50mm thick 1:1 cement mortar.
-
-
Vertical joints:
-
Roughen and clean the surface.
-
Apply adhesive or crystalline waterproof coating.
-
4. Metal Waterstops
-
Use 40cm-wide metal waterstops at horizontal wall joints.
-
Welding required—no field splicing allowed.
-
Welds must be tightly sealed and leak-proof.
🚰 Wall Waterproofing
To ensure waterproof integrity during construction:
-
Pipe Penetrations: Use water-absorbing flange rings and hydrophilic waterstops to effectively seal around wall penetrations.
🔎 Choosing the Right Leak Repair Materials
When selecting waterproofing materials for leak repairs, consider:
-
Structure Type: Roofs, basements, bathrooms, and exterior walls may require different materials.
-
Water Pressure: For high hydrostatic pressure (e.g., basements), use crystalline coatings or expanding waterstops.
-
Substrate Condition: Use self-adhesive membranes for smooth, stable surfaces; cementitious coatings for uneven or damp substrates.
-
Durability & Exposure:
-
Choose UV-resistant materials for outdoor use.
-
Use flexible membranes in areas prone to thermal movement.
-
-
Ease of Application: For quick repairs, select cold-applied coatings or waterproofing tapes.
Recommended Repair Materials:
-
Cement-based crystalline waterproof coatings
-
Polymer-modified self-adhesive membranes
-
PU or acrylic waterproof coatings
-
Hydrophilic swelling waterstops
-
Waterproof sealing tapes
Final Thoughts
Non-bituminous self-adhesive waterproof membranes offer a reliable and user-friendly waterproofing solution. However, proper substrate preparation, correct installation techniques, and thorough quality control are essential for long-term success. For repairs, selecting the right material based on your project ensures both efficiency and lasting protection.

Contact Us
For more information or to inquire about our waterproof floor paint solutions, feel free to get in touch with us. We’re here to help!
- Phone: +86 138 6365 6701
- Email: Huafengwaterproof@gmail.com
- WhatsApp: +86 138 6365 6701
We look forward to assisting you with all your waterproofing needs!