Waterproofing membranes are essential in Construction and Renovation because they avert moisture damage and ensure structural integrity. Regardless of the area of application; roofs, foundations, or bathrooms, waterproofing membranes must be applied carefully to prevent leaks and water damage. This post outlines how to utilize waterproofing membranes so that surfaces are not only dry but are durable.
1. Choose the Correct Type of Waterproofing Membranes
Beginning with selection, the project is bound to succeed once a tailored membrane is selected for the waterproofing assignment. Waterproofing membranes can be categorized into two major types:
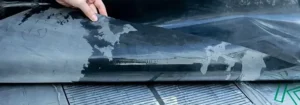
Sheet Membranes: These are bitumen, rubber and synthetic membranes that come in rolls. They are laid onto a surface and glued down at the edges.
Liquid Membranes: These styles are more suited for complicated surfaces since they are applied as liquids and become seamless upon curing. They are preferred around corners and joints that have more complex geometries.
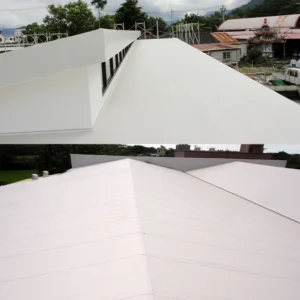
Choose the waterproofing membrane that best fits your needs, roof, foundation, or bathroom without compromise.
2. Surface Preparation
For the membrane to adhere and work effectively, surface preparation done prior needs to be flawless. To achieve this goal, follow these steps:
-
Clean the Surface: Remove any dirt, dust, oil, or debris from the surface. This will prevent contaminants from interfering with the adhesion of the waterproofing membrane.
-
Repair Cracks and Holes: Inspect the surface for cracks or holes and repair them. If there are any significant gaps, fill them with a suitable filler or patching compound to ensure a smooth, even surface.
-
Dry the Surface: Ensure the surface is dry before applying the membrane. Moisture on the surface can cause adhesion failure and prevent the membrane from curing properly.
3. Apply the Waterproofing Membranes
Once the surface is prepared, you can begin applying the waterproofing membrane. The application process varies slightly depending on whether you are using a sheet or liquid membrane.
For Sheet Membranes:
-
Unroll the Membrane: Lay the membrane onto the surface, making sure it fits well. Overlap the edges slightly, as instructed by the manufacturer.
-
Cut to Fit: If needed, use a utility knife to cut the membrane to the correct size. Be careful to avoid creating jagged edges.
-
Adhere the Membrane: If the sheet membrane is self-adhesive, peel back the backing and press it firmly onto the surface, ensuring there are no air bubbles. If it’s not self-adhesive, use an appropriate adhesive to bond the membrane to the surface.
-
Seal the Edges: Use waterproof tape or a special adhesive to seal all edges, ensuring there are no gaps where water could seep in.
For Liquid Membranes:
-
Mix the Membrane (if necessary): Some liquid membranes require mixing before application. Check the manufacturer’s instructions and prepare the mixture accordingly.
-
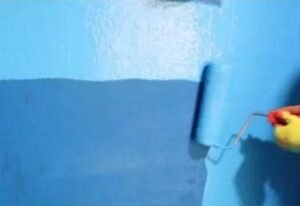
Apply the Liquid Membrane: Use a roller, brush, or trowel to apply the liquid membrane evenly across the surface. Ensure that you apply a consistent coat, covering the entire surface. For large areas, a sprayer can also be used for quicker application.
-
Apply Multiple Coats: Depending on the product, you may need to apply multiple coats. Allow each coat to dry fully before applying the next. The manufacturer will provide guidelines for the ideal thickness and number of coats.
-
Avoid Puddling: While applying the liquid membrane, ensure it doesn’t form puddles or thick areas, as this can affect the curing and efficiency of the membrane.
4. Curing and Drying Time
After application, allow the membrane to cure and dry according to the manufacturer’s recommendations. Curing times vary depending on the type of membrane and environmental conditions. Avoid any foot traffic or exposure to water during the curing process, as this can damage the membrane and reduce its effectiveness.
5. Test the Waterproofing
Once the membrane has fully cured, it’s time to test its effectiveness:
-
For Liquid Membranes: You can test the membrane by applying water to the surface and checking for leaks. It’s essential to ensure there are no visible signs of water seepage or dampness on the other side.
-
For Sheet Membranes: Check the seams and edges to ensure they are tightly sealed. Press down on any areas where the membrane may have bubbled or shifted.
6. Maintain the Waterproofing Membranes
In order to keep a waterproofing membrane functional, it must undergo regular maintenance. It is important to keep the membrane’s surface clean as well as free from potentially damaging debris. Repair any cracks or tears that may develop in order to ensure the waterproofing remains intact.
Final Remarks
Each building or structure requires waterproofing membranes since they serve as a crucial element to durability and waterproofing. Choosing the right waterproofing membranes, appropriately dealing with surface preparation, and accurate application of the membrane enables the prevention of property damages due to water hence saving cost on repairs. The application of waterproofing membranes is cost efficient and enhances the structural integrity, so whether working on new constructions or performing renovations, it is the best approach.
For more information or to inquire about our Asphalt Waterproof Material, feel free to get in touch with us. We’re here to help!
- Phone: +86 138 6365 6701
- Email: Huafengwaterproof@gmail.com
- WhatsApp: +86 138 6365 6701
We look forward to assisting you with all your waterproofing needs!